How To Clean A Dryer Vent: A Step-by-Step Guide?
Cleaning your dryer vent is one of the most important maintenance tasks for your dryer. Not only does it help your dryer run more efficiently, but it also prevents a major fire hazard. Lint build-up in dryer vents is a common cause of household fires, and regular cleaning can greatly reduce this risk. In this post, we’ll guide you through the steps on how to clean a dryer vent safely and effectively.
Why Cleaning Your Dryer Vent is Important?
Over time, lint, dust, and debris accumulate in your dryer’s vent system, which can restrict airflow. This blockage forces your dryer to work harder, resulting in longer drying times, higher energy bills, and even overheating. If left unchecked, excessive lint build-up can become a fire hazard.
Signs Your Dryer Vent Needs Cleaning
Before we get into how to clean your dryer vent, let’s look at some signs that indicate your vent might be clogged:
- Longer drying times: Clothes take longer to dry or come out damp.
- Burning smell: A musty or burning smell while the dryer is running.
- Excessive lint: You notice more lint than usual in the lint trap or around the dryer.
- Overheating: The dryer feels unusually hot to the touch during or after a cycle.
- Increased humidity: There’s more moisture in the laundry room while the dryer is running.
If you notice any of these symptoms, it’s time to clean your dryer vent.
How Often Should You Clean Your Dryer Vent?
It’s generally recommended to clean your dryer vent at least once a year. However, if you run the dryer frequently or notice signs of blockage, you may need to clean it more often—especially if you have a large household or pets, as these factors can increase the amount of lint and debris that gets trapped in the vent.
Tools You’ll Need
Before you start, gather the necessary tools to ensure an efficient and thorough cleaning:
- Dryer vent cleaning brush kit (includes long, flexible brushes)
- Vacuum cleaner with a hose attachment
- Screwdriver (if needed to remove the vent cover)
- Lint trap brush
- Duct tape (optional, for re-sealing joints in the vent system)
Step-by-Step Guide on How to Clean a Dryer Vent
Step 1: Unplug the Dryer
For safety, make sure to unplug the dryer from the power outlet. If you have a gas dryer, turn off the gas supply before starting any work.
Step 2: Locate and Disconnect the Dryer Vent
Pull the dryer away from the wall to give yourself access to the vent. Locate the dryer’s exhaust vent, which is typically at the back of the machine. Carefully disconnect the vent hose from the back of the dryer. Depending on your setup, this might require loosening a clamp or unscrewing a connection.
Step 3: Clean the Lint Trap and Vent Duct
Remove the lint trap from your dryer and use a lint trap brush to remove any excess lint that may have accumulated. Even if you clean the trap after each load, lint can still build up in hard-to-reach places.
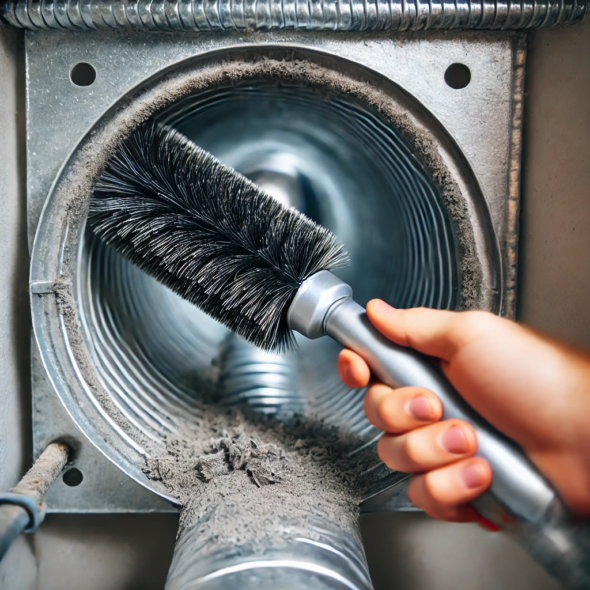
Next, use the long brush from your vent cleaning kit to clear out the vent duct itself. Insert the brush into the vent duct and twist it while pulling it out, collecting the lint and debris along the way. Repeat this several times until the vent is clear of lint.
Step 4: Vacuum the Vent and Exhaust Hose
After brushing the vent duct, use a vacuum cleaner with a hose attachment to suck out any remaining lint or debris from both the vent and the hose. Be thorough—lint can settle deep in the vent, and vacuuming helps remove what the brush might miss.
For extra deep cleaning, you can also vacuum around the dryer’s motor and the floor area behind the appliance, as these areas can also accumulate dust and lint.
Step 5: Inspect and Clean the Exterior Vent
Now, head outside to locate the exterior dryer vent cover (often on the side of your house). Remove the cover, if necessary, and clean out any lint or debris that may have accumulated there. Use the vent brush to reach deep inside the vent and remove any blockages.
Make sure that the vent cover’s flaps open and close freely to ensure proper ventilation.
Step 6: Reassemble Everything
After cleaning both the interior and exterior vents, reconnect the vent hose to the back of the dryer. If needed, secure the connections with duct tape or clamps. Make sure the hose is properly connected and is not kinked or bent.
Once everything is securely in place, push the dryer back into its original position.
Step 7: Plug In and Test the Dryer
Now that everything is clean and reconnected, plug the dryer back in and turn on the gas supply (if applicable). Run the dryer on an air-dry or fluff setting for about 10-15 minutes to ensure that the vent is properly clearing the air. Check the outside vent to see if air is flowing freely.
Tips for Keeping Your Dryer Vent Clean
- Clean the lint trap after every load: Removing lint after each cycle is the easiest way to reduce build-up in the vent system.
- Avoid overloading your dryer: Large loads produce more lint, which can clog the vent quicker.
- Use dryer sheets sparingly: Dryer sheets can leave residue that contributes to vent blockages.
- Consider professional cleaning: If your vent system is particularly long or hard to reach, professional cleaning services can ensure it’s thoroughly cleaned.
Conclusion
Cleaning your dryer vent is a simple but critical task that can improve your dryer’s efficiency and, most importantly, reduce the risk of fire. With just a few tools and a bit of time, you can keep your dryer running smoothly and safely. By following this step-by-step guide, you’ll ensure your vent stays clear and your dryer operates efficiently for years to come.
